In order to unleash the full potential of your Samsung Galaxy Note 3, you’ve got to root it. These days, it’s easier than ever, and can be done by just plugging your device into a Windows computer and pressing one button. It’s so easy, your grandmother could do it, so what’s stopping you?
After you root, make sure to follow our guides to enhance your Note 3 experience by putting data speeds in your status bar, adding your favorite apps to the Pen Window, and more. You can also check out root hacks and Xposed mods on Galaxy Note 2 softModder, most of which will work on your Note 3.
To make rooting even easier on you, I’m going to lay out the whole procedure right here. Even though it’s a one-click rooting process, there is some initial legwork involved, like backing up and installing the one-click Kingo software on your Windows PC.
Update: There is a new root method available, and it’s easier than ever—no cords, no computers. All you need is one app and you’ll be rooted in less than a minute. Check out the guide here.
This method will work for Android 4.3 and above.
Step 1: Back Up (Optional)
As a precaution, back up your entire device with the Samsung Kies software in case anything goes wrong with the rooting process.
Step 2: Check Your USB Cable
Be aware that the most common occurrences of failed rooting attempts stem from a frayed or disconnected USB cable and a low battery, so make sure your cable is firmly connected and you have at least 50 percent battery remaining before continuing.
Step 3: Enable USB Debugging
In addition to checking your USB cable and power, head over to Settings -> General -> Developer options and check USB debugging so that your phone can connect properly to your computer.

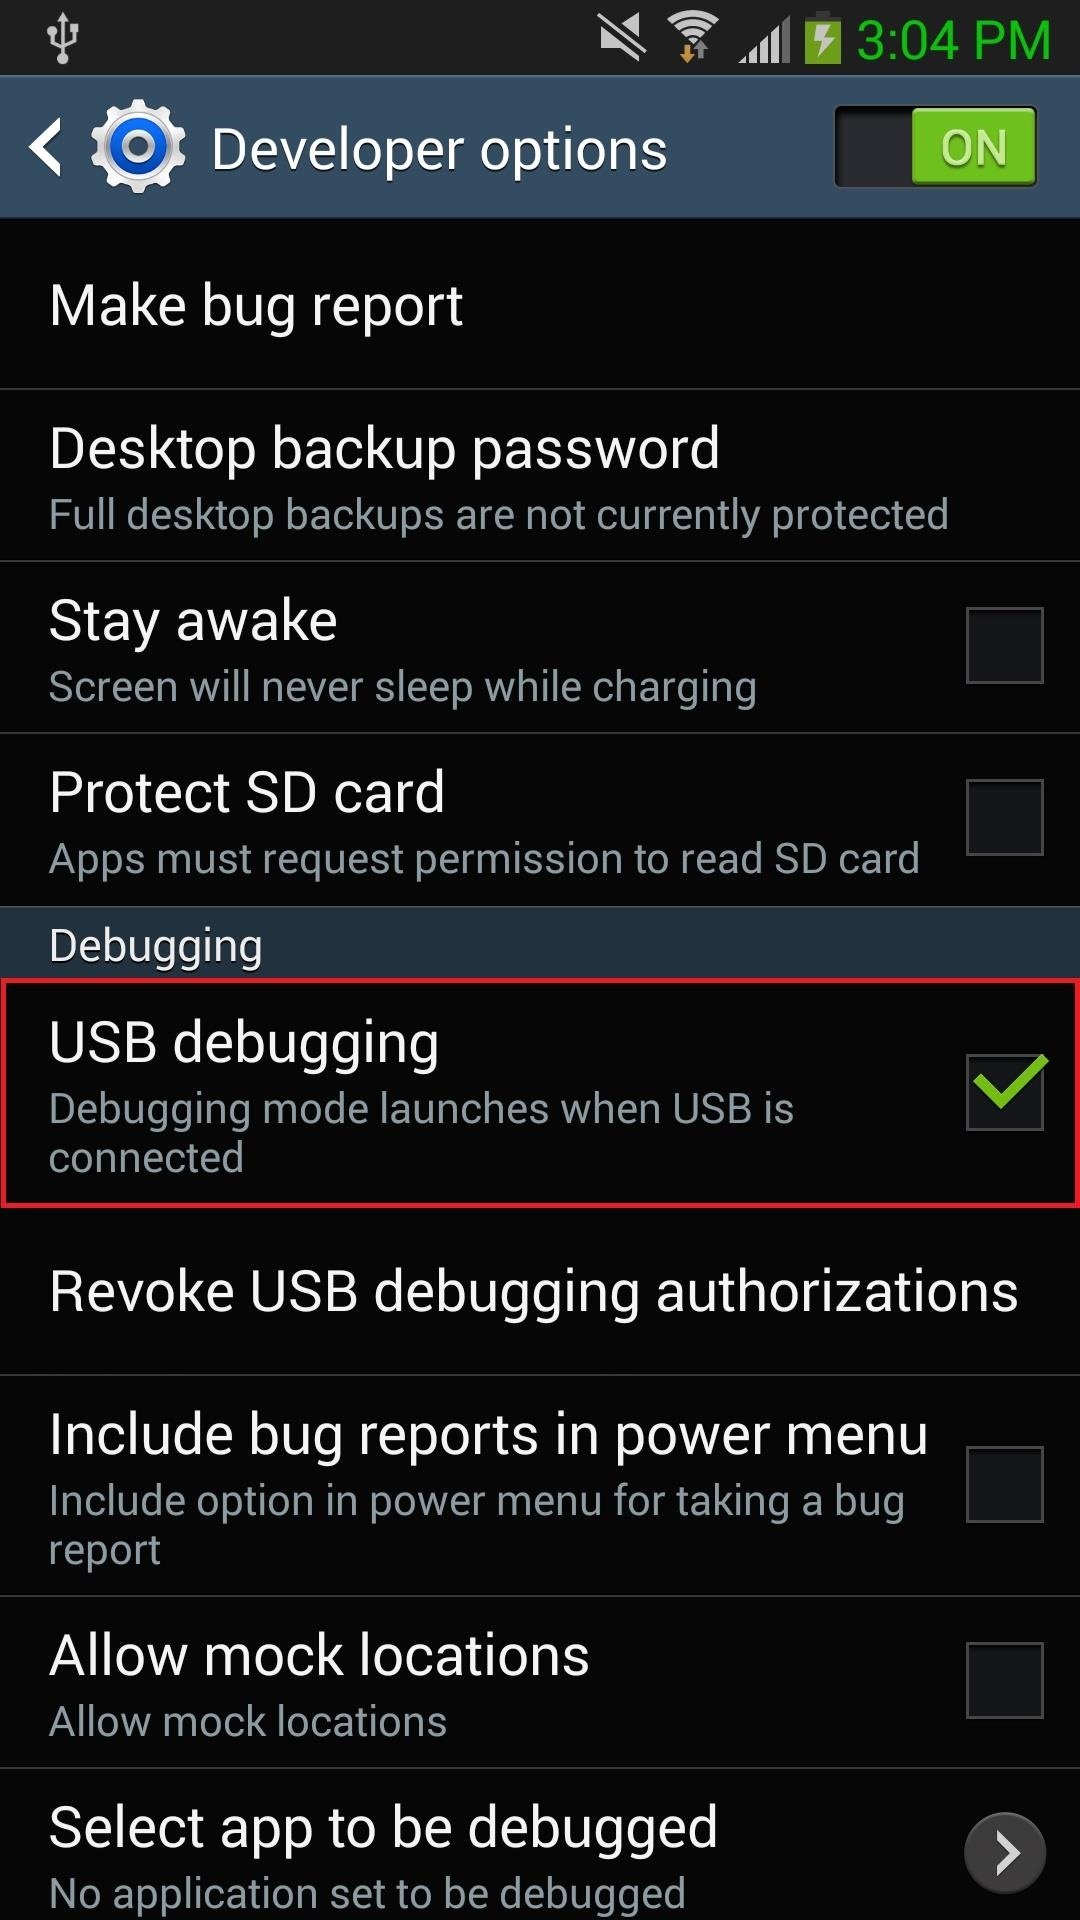
If you don’t have any Developer options, head to Settings -> General -> About device and tap 7 times on Build Number in order to unlock Developer options.
Step 4: Install Kingo on Your PC
Now download the Kingo software onto your Windows computer, run the Android_Root.exe file, and follow all of the instructions in order to successfully install it on your Windows computer.
Step 5: Root with Kingo
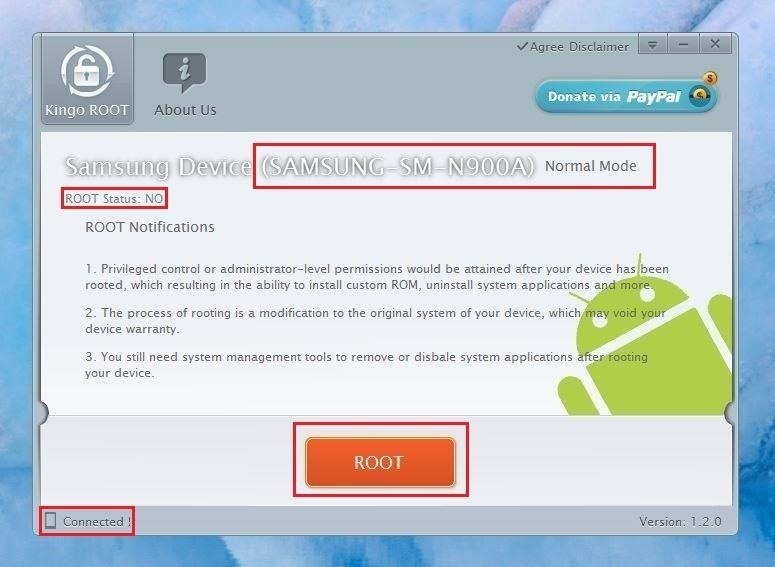
Once installed, open up Kingo and connect your device, which the application will recognize instantly, giving you the device name and model number. You’ll see a few notes about the root process, as well as your root status in the upper left-hand corner.
Once you’re ready to root your Note 3, click on the big, bad ROOT button. The program will then begin working its magic, with the entire process taking about five minutes in all.
Step 6: Install MtkCamera on Your Note 3
During the rooting process, your device will automatically ask you to install an application called MtkCamera, which is the exploit used to gain root access through the processor.
Make sure “I understand that this app may be dangerous” is checked and hit the Install button to proceed. Don’t worry, this file is totally safe and absolutely necessary to root.
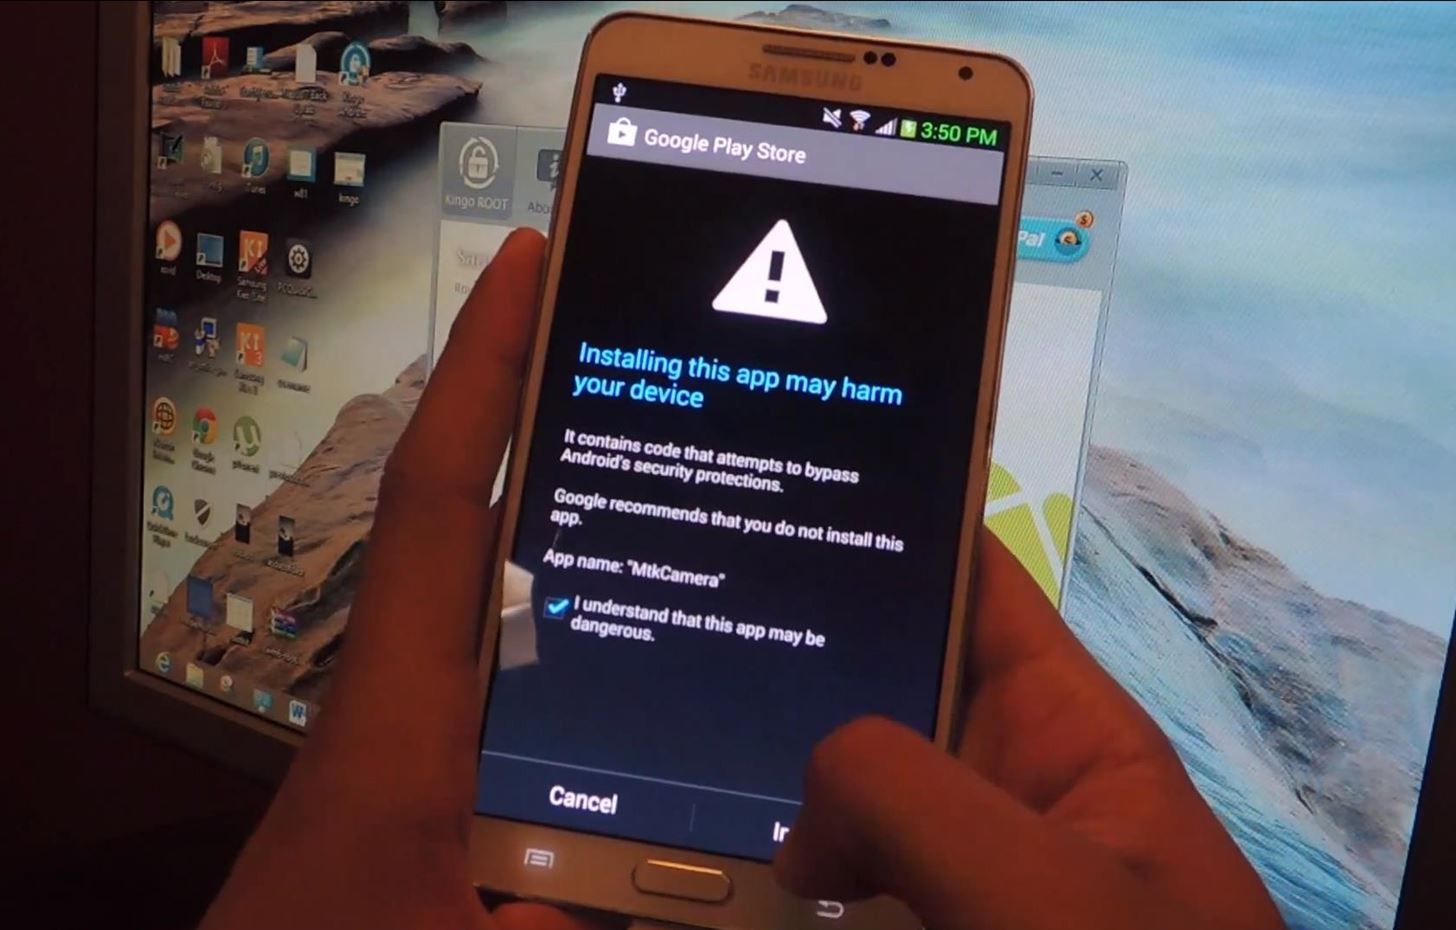
Your device will now reboot.
Step 7: Verify Root Status
When your Note 3 reboots the process is complete, and Kingo will say on your PC that root was successful. You should now see the SuperSU app on your device, which grants permissions to applications that require root access.
Additionally, you can download Root Checker for free from Google Play to verify your newly rooted status.
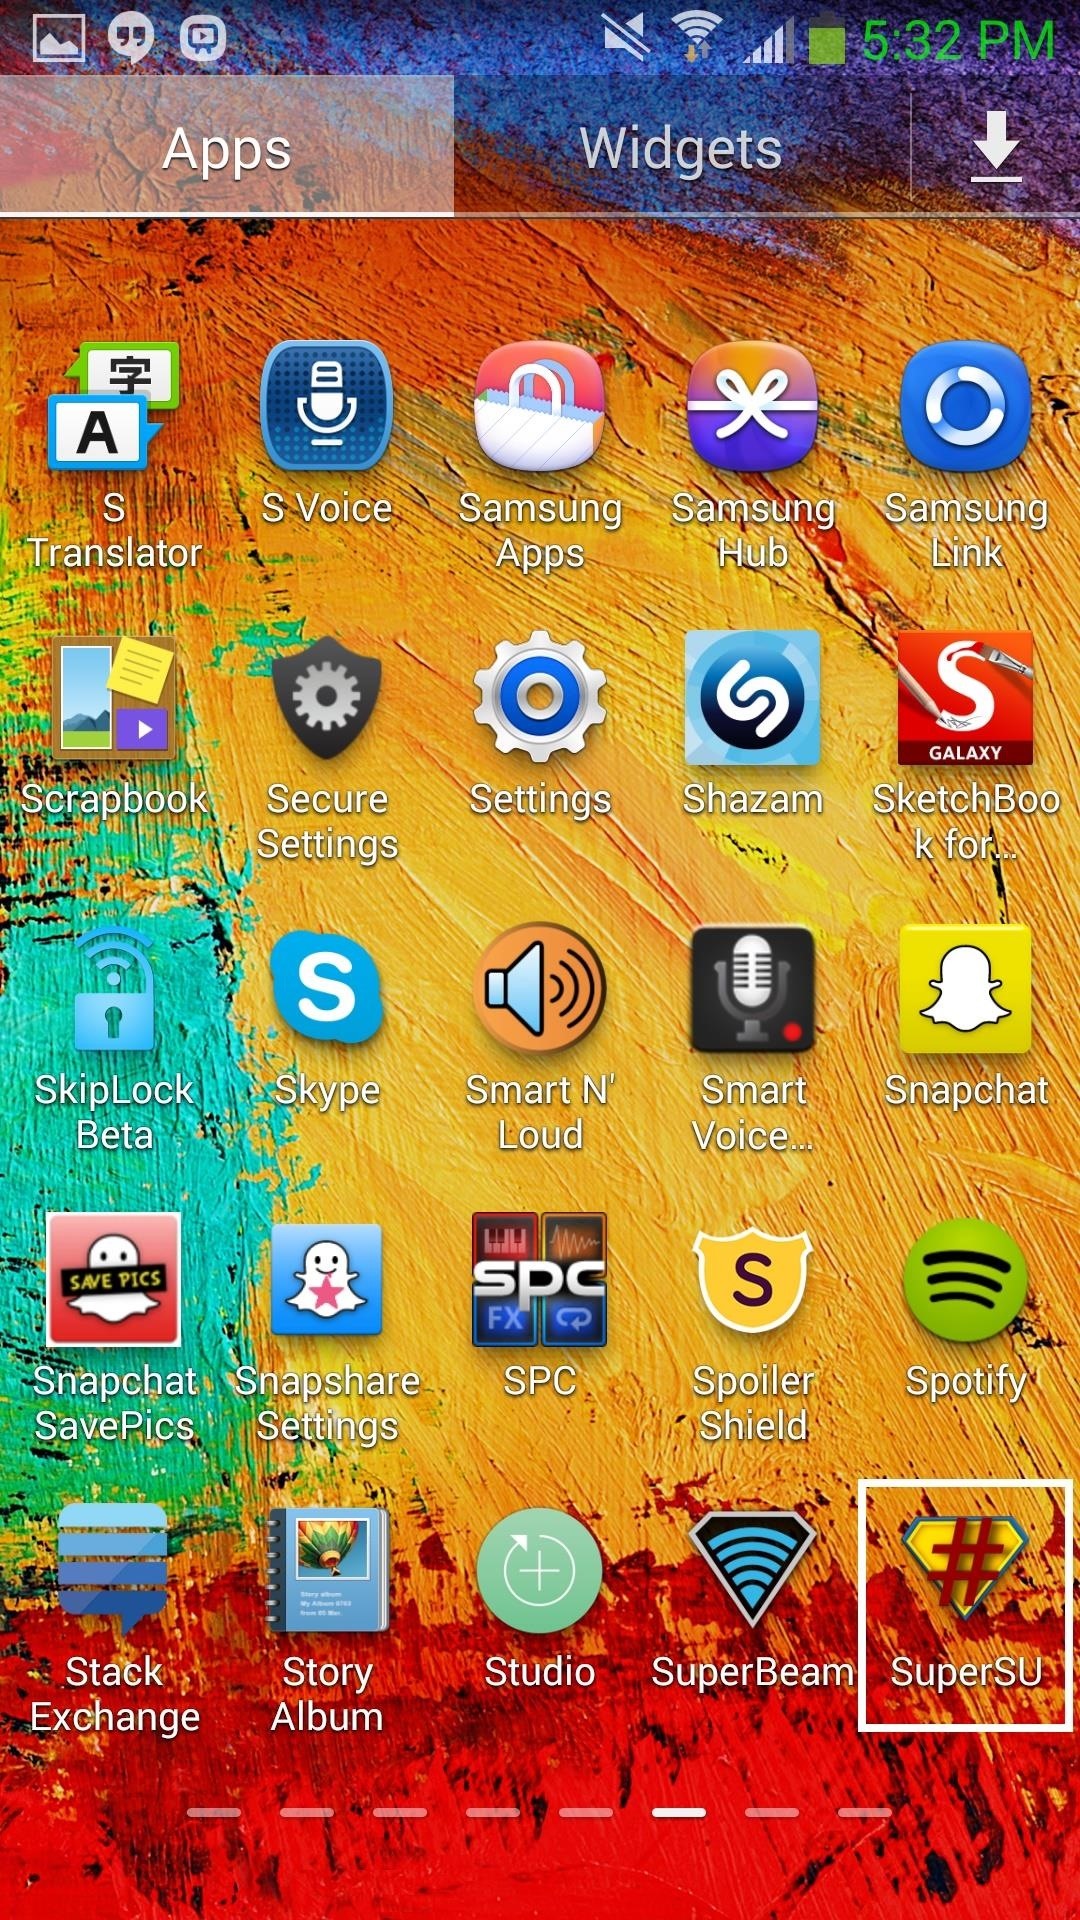

Okay, so all in all, this wasn’t exactly “one-click” rooting (it’s more like “two-click” because of the MtkCamera exploit, or technically “one-click, one-tap”), but it’s way easier than you thought, right?
Step 8: Explore Root-Only Features
Now that you’ve entered the world of rooted devices, turn off annoying features like persistent notifications, enable hidden features, or revert back to features that you miss. And of course, now all of the cool Xposed mods that you’ve been hearing about are at your fingertips. Enjoy.
Just updated your iPhone? You’ll find new features for Podcasts, News, Books, and TV, as well as important security improvements and fresh wallpapers. Find out what’s new and changed on your iPhone with the iOS 17.5 update.
“Hey there, just a heads-up: We’re part of the Amazon affiliate program, so when you buy through links on our site, we may earn a small commission. But don’t worry, it doesn’t cost you anything extra and helps us keep the lights on. Thanks for your support!”


